How to Create Shops with Ultimate Economy Bot
To enhance your server’s economy system, Ultimate Economy Bot (UEB) lets you create custom shops where users can spend their earned currency. Follow this simple guide to set up shops and manage items effectively.
Prerequisite
Ensure the bot has the Manage Channels permission. While this isn’t required, it allows UEB to create notification channels for a smoother experience.
Step 1: Create a Shop
To start, use the command /create-shop. This will open a form where you can name your shop and provide a description.
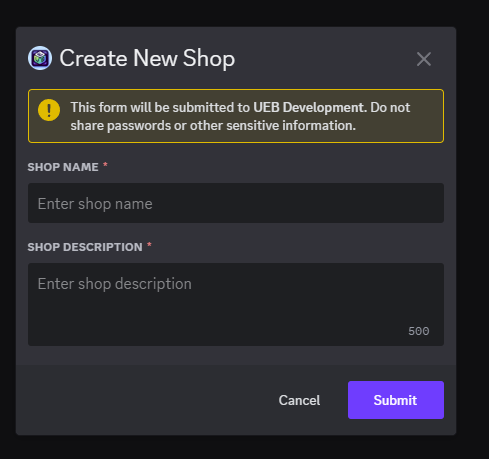
- You can create multiple shops and delete or edit them later.
Step 2: Edit the Shop
After creating a shop, use /shop-edit to select the shop you want to manage.

Click + New Item to add an item to your shop.

Step 3: Add Items to the Shop
Fill out the form to create your item. Use Markdown and emojis to make the item description engaging.
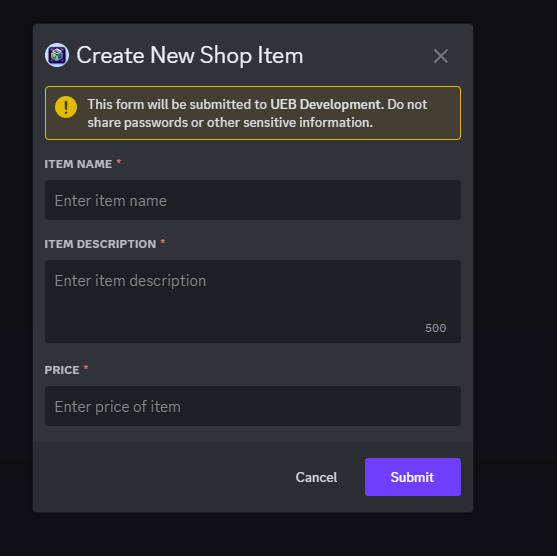
Once you submit the form, you’ll see a confirmation message: “Shop item created successfully.”
Step 4: View and Use the Shop
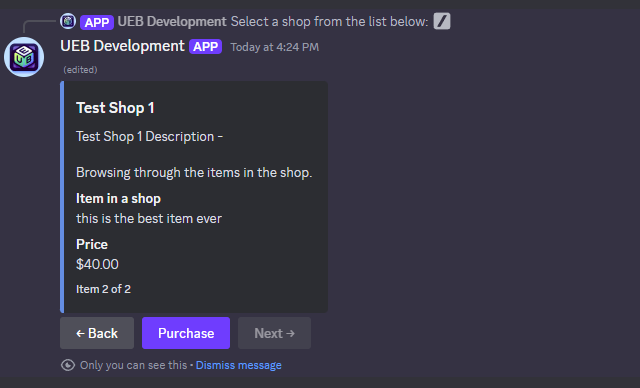
Use the /shop command to open the shop and select the one you just created.

You’ll see the items listed in the shop. Click the Purchase button to buy an item.
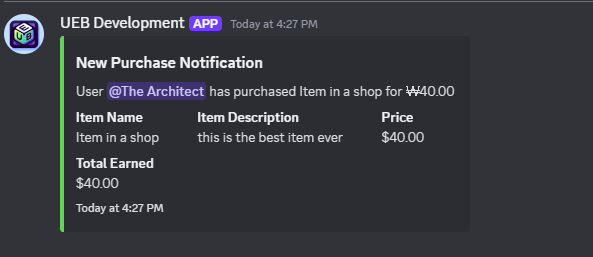
Step 5: Purchase Notifications
When you purchase an item:
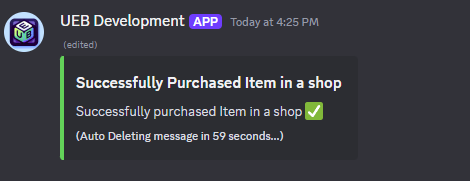
- If you have enough currency (use
/spawnto add currency for testing), you’ll receive a Purchase Successful notification.
- Within 1–5 minutes, a channel named
#notifications-{shop name}will be created for shop-related updates. If the bot lacks permission to create channels, notifications will be sent via direct message (DM).
Troubleshooting
- If notifications don’t appear, check that the bot has permission to:
- Send messages in the notification channel.
- Message you directly.
- Ensure the bot has Manage Channels permission for optimal functionality.
Now your shop is ready to go! Your server members can enjoy spending their currency in your custom shops. 🎉
For more tips and features, visit UEB Dashboard.